

Teasing, backcombing, and bleaching are words synonymous with my teenage years when it comes to my hair. My hair was, and still is, my pride. Not even makeup. My hair. So I would do whatever I needed to do to achieve the hairstyle I wanted. As a result, I lost a great deal of hair. Hard times. BUT, it is all goooood now. My hair today is healthy, thicker, and much stronger (even without the occasional teasing). How? Because of this oil routine. I use three oils in one sitting:
1. Coconut Oil

I am sure this oil is no surprise. I recommend getting the ‘extra virgin coconut oil’ if you can get yours hands on it, otherwise pure coconut oil is good. I got this because I had no other choices or places to go in Lancaster (a small town where I went for university). The best aspect about coconut oil is its penetrating ability of the hair follicle where it can effectively remove the build-up of sebum (Journal of Cosmetic Science, 2005), thus preventing hair breakage (ibid, 1999). Sebum production is the release of natural oil from the sebaceous glands onto scalp to prevent dryness and keep your hair moisturised. However, too much of this can cause hair loss owing to build-up. The antibacterial properties is what also prevents the infections of hair follicles hence why this oil is hailed to promote hair growth. Coconut oil contains high concentration of vitamins which is great for shiny and healthier hair!
2. Amla Oil

I get my Amla oil from Dabur in the ‘Gold’ version just because it also has Almond oil and Henna (Almond is similar to Amla oil). Amla is an Indian Gooseberry found in the Indian subcontinent and in the Middle East.
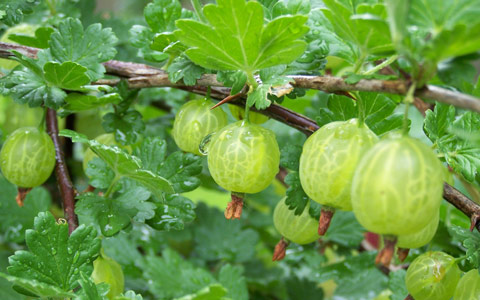
Just like coconut oil, this oil is also high in essential fatty acids as well as nutrient contents: iron, vitamin A & C, fibre, potassium, calcium, and magnesium – vital goodness for shiny and strong hair strands! (Dillon, x). While henna does moisturise hair, it also lightens the hair a shade or two over time. If you rather not have this, then you can purchase the original package which only contains amla oil.
If you want, you can switch this oil with similar other oils: Almond oil; Jojoba oil; Olive oil; Argan oil; & Peppermint oil. All of these oils, including Amla, contribute as a moisturiser thus making hair shiny.
3. Castor Oil.

My most favourite holy grail. The oil that gave me my eyebrows back, *a minute silence for eternal gratitude*. Castor Oil comes from the castor plant known botanically as Ricinus Communis a native to India, Easter Africa, and the Mediterranean Basin.

VERY HIGH in anti-fungal properties, it removes concentrated dirt, build-up, infections as well as preventing them. It has a 90% fatty acid content called ricinoleic acid which balances PH of the scalp explaining its super effectiveness in almost ‘resetting’ your scalp void of everyday products. It boosts the growth rate by 3-5x depending upon its use, and I vouch for this! Trust me when I say that this oil would be one of the things I would grab if my house was on fire (although, you should not take anything and leave immediately).
Try to get your hands on the African Black Castor oil. Why? This version is much richer in the fatty acids identified above.
The Steps:
- I start with 3 teaspoon of Amla oil, and then two teaspoon of Coconut oil. If your coconut oil is liquid as opposed to solid then I suggest 3-4 teaspoon. Mix this until all solids have dissolved.
- Into a separate small cup/bowl, measure 1 teaspoon of Castor oil.
- Before lathering the first mix of Amla and Coconut oil onto your hair, some people choose to warm it up slightly whether on the hob or in the microwave for 20seconds. I do not do this, instead I massage the oil to create that slight warmth. This is entirely up to you! When lathering onto your hair, make sure you get all hair strands especially down at the ends, the ends are usually where minerals and vitamins are lacking – especially if you are an avid hair straighteners user!
- After this, get Castor oil onto your fingertips and massage directly onto your roots only. Castor oil is a very heavy substance, so if you put too much of it then it will take more than one shower to remove it completely. I once did this and had to take 3 showers to fully cleanse my scalp. This is why I prefer to massage it onto my scalp and roots only. Alternatively, you can instead mix it with the coconut and amla oil formula and apply it all over your head and hair. This will take much less time, and lower the risk of putting too much castor oil!
- Massage, massage, massage. Circulation of the oil around your scalp sets a warmth motion of a good blood circulation. This is the key to get the most from the oils.
- Tie your hair up into a bun or wear a shower cap/bandana to keep it all in one place and in warmth.
- I tend to leave the oil on for over night or a full day to get the most out of it. Otherwise, you can just leave it on for 2-3 hours at minimum.
Repeat this at least once a week and after at least a fortnight you will see results! Happy hair care! xo
Links
Castor Oil 100ml, £7.00 – goo.gl/LoCFay. // Jamaican Black Castor Oil 8oz (220ml), £9.00 – goo.gl/wwUEmG. // Or, go to Asian/Black/Muslim stores for the KTC Castor Oil which is typically between £1.50-£2 for 250ml.
Dabur Amla Oil Original (w/o Henna & Almond) 200ml, £3.49 at Superdrugs – goo.gl/bwHGRk. For the Gold version (w/ Henna & Almond), 200ml, £3.99 – goo.gl/rB8Gjt.
Pure Coconut Oil 175ml, £3.97 – goo.gl/VvD3Lq. // Raw Organic Virgin Coconut Oil 500ml, £5.97-10 – goo.gl/YZ2Soa. // Otherwise, you will for sure find some in Asian/Black/Muslim stores though it is for pretty much around the same price so the raw organic oil linked just before this one is better if it is still on sale (even if it is not, it is still the better one).


")


